

When we talk about glazing in watercolour, I’m not talking about doughnuts (though I wish we were!). But like the word implies, “glazing” is basically a layering technique, where a transparent layer is added on top of a previous layer.
Beyond pastries, the technique of glazing applies to ceramics, too. It’s something that showcases the transparent quality of watercolour paint.
So let’s bite into it, shall we?
Glazing Chart

You might have seen glaze samples that ceramists use, as the dried glaze often isn’t the same colour as when you see it in its liquid form, especially after its been fired.
Watercolour works the same way (minus the firing), so let’s create a glazing chart for your watercolour paint!
This is relatively simple. With your choice of colours and a large mop brush, paint one long horizontal stripe for each colour. The paint should be relatively diluted, and make sure to label each colour so you don’t forget!
After these stripes of paint are dry, paint another stripe for each colour, this time in the vertical direction so they overlap your previous stripes in a criss-cross pattern.
Paint in the same order as well, so you get an organised chart of what each resulting colour looks like when it’s been glazed with a different one.
You’ll notice that layering 2 different colours also look slightly different depending on which was used first.
In addition, with this technique, you can create a lot of depth in your painting – more so than if you directly mixed the 2 colours on your palette and used that instead (as demonstrated in the picture below).

In any case, this is a handy chart that shows what layering your paints would look like, and how an underlying paint colour will affect the subsequent colours that are layered on top.
You can also refer to it whenever you paint with the same set of colours, which is very useful for getting to know your paints better.
Bonus tip: For your first glazing chart, try to stick to a more limited palette of around 3-6 colours to keep it simple.
Undertones and Depth

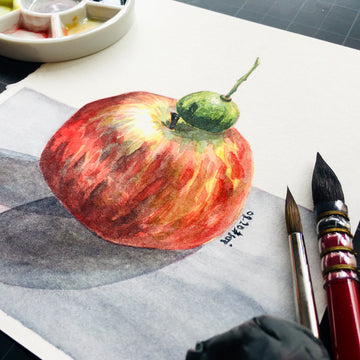
With the technique explained, let’s try putting it into practice! I’ve grabbed an apple and a lime from the fridge, as they both have pretty defined undertones. (Check out this timed painting exercise too, if you're keen on painting fruit!)
When I say “undertones”, I mean the underlying colours that make up the complete colours you get in the two fruits. You can see this in the pale yellow areas near the stems, which makes sense as unripe apples and limes are yellow before they turn red/green.
Once you have your first layer of colours, make sure it’s dry before glazing on your next layer. You can even repeat this technique until your paper can’t take any more water!
You’ll find that you can build an incredible amount of depth; much more than if you simply painted the apple and lime a single layer of red and green.
Bonus tip #2: Use good quality watercolour paper, preferably around 300gsm with 100% cotton like the Etchr Sketchbooks!
This will be best for layering more paint, and also for painting without having the previous colours lift off and mix into your latest layer.
The “Cellophane” Effect

Another way to use the glazing technique is when you want to add the same shadow across several subjects, or when you want each individual layer to be seen, similar to layering 2 sheets of cellophane.
You can create some pretty unique and interesting paintings this way, so feel free to experiment!
Final Thoughts

As with anything, it’s going to take practice to be able to see all the undertones of any object or scenery.
It’s also going to take time and experience to build up those layers to reflect the colour you want, especially when you’re just starting out.
But the basic principle behind this technique is the same, so it won’t be difficult to pick up and start incorporating into your watercolour art!
And take heart – the road to mastering anything always begins with that first step.
Do you like using the glazing technique? What’s the most difficult thing about glazing and layering your watercolours? Or do you prefer painting in one single layer? Let us know in the comments below!