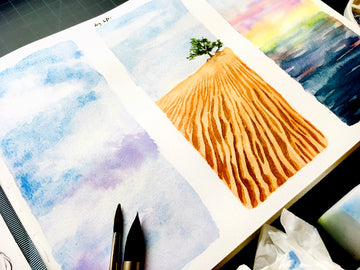
“Do you even lift?” Well, when artists talk about “lifting”, we’re not talking about going to the gym! It’s actually a nifty technique used in watercolour painting, whether it’s to fix a mistake or to add a certain effect.
I’ll demonstrate the basics of the most common lifting techniques; and when to best utilise each one, but as always, you’re free to experiment on your own.
Method 1: Wet Lifting

One of the most common and easiest ways to lift watercolour paint is to dab a clean cloth or tissue over your wet paint. It’s also the quickest way to fix any mistakes immediately, as the paint pigment hasn’t had time to settle in the paper’s pores yet.
Depending on what you’re using to lift the paint, you can even get a faint texture of the lifting object – a “fingerprint”, if you will.
For example, using tissue leaves a very soft patch of space, while something like a terrycloth will leave a fur texture.
Apart from “undoing” your brushstrokes, wet lifting is also great for creating soft clouds, as sometimes it’s difficult to leave the right shape or space while trying to paint around your clouds.
Creating a “misty” effect is possible too! Just remember that you should always gently dab your tissue/clean cloth on your wet paint, as any scrubbing motion could tear your paper or make the fibres pill.
Bonus Tip: You can also do some wet lifting with a dry brush. This will be a much more precise way to lift paint, especially if there’s an exact shape you need to lift out! Also, note that some paints don’t lift as easily as others, especially dye-based paints. This is because they bind to the paper’s fibres much more quickly than natural pigments. If you’re not sure about your own paints, you can always do a quick test on a piece of scrap watercolour paper to check.
Method 2: Dry Lifting

Sometimes, you’ll find that you need to lift the paint after it’s dry and this is where dry lifting comes in!
While it sounds like it’s the opposite of wet lifting, the basic principle behind it isn’t so different. What you need to do is to wet the area you want to lift, which reactivates the dried paint, then either uses a paintbrush to gently “lift-off” the paint or use a tissue or cloth again to absorb the paint.
You probably will notice that dried paint isn’t as easy to lift as wet paint is, but with a little bit of gentle scrubbing, you can get some very controlled results, even if the paper won’t go back to its original colour.
Either way, it’s a good method to use if you just want to lighten some parts of your painting again (e.g. like adding back some highlights), or if there are some paint bleeds that need cleaning up. It’s also good for softening edges!
Tip: You may notice that dry lifting is super easy on some lower quality watercolour papers. This is actually a downside, as sometimes the paint will come off when you try to layer them. Other low-quality papers may tear or pill too easily, which doesn’t help either. So I’d recommend getting some good quality, 100% cotton paper! It will make lifting techniques more viable, while also being able to use other techniques like layering.
Bonus tip: If you plan on using a paintbrush to lift, use an old synthetic brush with stiffer bristles to lift more.
Method 3: Magic Sponge

The final way to lift is a little gimmicky, but it works pretty well. All you need is a “magic sponge”, i.e. one of those sponges made from melamine foam.
This type of sponge is really good at picking up dirt and paint pigments, so all you need to do is to wet it before gently rubbing it over the area you want to lift. You can also cut the sponge into smaller pieces to get more detailed lifts!
This method is good for lifting out larger areas, or if you need to lift out very sharp lines. I don’t use this method much, as I find that the other 2 methods work really well already. The option is there if you need it though!
Lift like a Pro

At the end of the day, lifting is a useful technique to know, even if you don’t plan on using it much. From quick fixes to create certain effects, it’s really just another tool to add to your watercolour practice.
There are always other options, such as adding highlights with a white gel pen instead of lifting or covering mistakes with white gouache paint.
A quick warning: paper that has been dampened previously tends to be more fragile, so remember to be extra careful if you plan to paint in the same area that has been lifted.
Also, don’t do any lifting in the same area more than 2-3 times – it’s a sure-fire way to damage the paper’s surface!
Either way, it won’t hurt to try lifting. It’s a great way to build those watercolour “muscles”, and to just have fun trying something new!
Is there a particular effect you like to create via lifting techniques? What other techniques could you pair with lifting to create something unique? Feel free to share with us in the comments below!


