Let’s talk about charcoal and how artists use it to create magnificent works of art. The biggest turn off for using charcoal is that maybe it’s a little too unwieldy. It’s difficult to get the same fine, pristine details that we would with graphite and mechanical pencils.
This is very true, and any creative who has used charcoal knows this. Charcoal (both vine and pencil) handles differently than graphite pencils. Because of the soft nature of its core, the fine tip of a charcoal pencil wears down quickly.
In fact, it wears down so quickly, it can be frustrating to try sketching fine details. Our familiarity with the ease of precision of graphite pencils can be a stumbling block if we don’t approach charcoal with an open mind.
But, approaching charcoal as a medium unique to graphite can help us put aside the preconceived ideas we have about it and how we think it should handle.
The following are a few tips to make your journey with charcoal as smooth (and as fun) as possible!
A Nuanced, Multi-faceted Medium
Typically (there are always exceptions), charcoal is a medium that produces soft figures with high contrast. The details might not be as sharp and precise as you would have in a drawing finished with graphite pencils.
This doesn’t mean that it’s impossible to achieve precise drawings with charcoal, but the medium lends itself to a soft, blended look.
We can always use it to do what we want with it; but it is also good to remember to use mediums for what they were intended—while adding our own, unique flair and style.
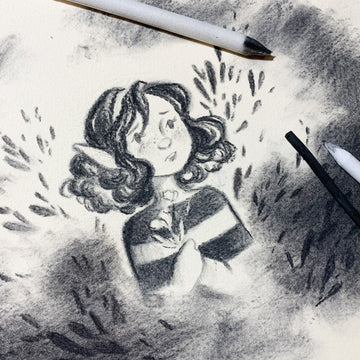
Charcoal creates dynamic drawings through nuance, softness, and high contrast. Because charcoal is so incredibly soft, it is easy to blend.
This can be used to create dream-like or hazy illustrations that invoke the imagination.
Where it’s a temptation to be overly exact and too detailed with graphite, charcoal does best in playing to the subtleties of sketches and drawings.
Using it to imply, skilfully, what might be lurking in the background (without over rendering it) is just one of the many things this medium can achieve.
Charcoal drawings are easier and faster to polish off than a graphite drawing. If an artist is pressed for time but needs a drawing to look perfectly finished, charcoal can achieve that finish very quickly.
Important Tools to Use in Charcoal Sketches

Getting the right outcome with charcoal takes more than just a few charcoal pencils (or charcoal vines).
There are a few other tools to help artists get the right amount of detail and nuance in their pieces. These tools are incredibly important to the process:
- charcoal vines (or pencils)
- erasers: rubber, kneaded, & fine tipped erasers
- tissues
- blending sticks
These aren’t fancy, expensive tools, but they will help the illustration process remarkably.
When it comes to choosing vine charcoal or charcoal pencils, the choice is up to every, individual artist. There are pros and cons to both.
Vine charcoal is softer, and because the entire stick is exposed (instead of being encased in a wooden sheath) it can be messy to leave lying around.
However, because they are significantly more fragile and we see it, we are more likely to be careful in our handling of the vine charcoal.

Charcoal pencils look sturdy, and we might feel free to let them knock around. This damages the core inside, breaking it up. When we go to sharpen them, the tips will break off because of the internal damage.
The upside is that charcoal pencils aren’t as messy, and it’s easier to sharpen them to a fine point for details.
Every artist needs erasers for creating their work, but when it comes to charcoal drawings, sketches, and illustrations, erasers are actually a part of the creative process.
Because charcoal is so dark and is used on white paper, there are many high contrast areas. Using erasers to lighten areas after they have been saturated with charcoal is a fun, nifty trick.
It adds subtle highlights to objects; and if you have an eraser with a very fine point, it can add detail to the piece as well.
Using every day tissues can add a few interesting effects. Lay down a few layers of charcoal (either light or dark, depending on what the illustration needs), and then gently use the tissue to rub out the charcoal.
This effect can create clouds, hazy backgrounds, trees, etc. There is no end to the effects you can create with tissues.

Blending sticks might be one of the most important tools for creating charcoal pieces. Blending sticks give artists so much control over the charcoal.
After you lay down your layers of charcoal, you can use the fine points of the blenders to push the particles of charcoal around on the paper. It allows you to control (with more detail) where the charcoal is going.
They can also be used to blend the texture of the charcoal into softer, gentler layers.
You can also “load up” the blending sticks with some of the loose charcoal from one area and then gently apply it to untouched parts of the paper for soft, light shading or texture.
Blending often times rubs most of the loose charcoal further into the paper. This lightens the layer of charcoal. Use this to your advantage. (Check out our 100% cotton cold press sketch books–perfect for texture!)
If you want lighter layers, remember that blending the layers out will help; but if you need the layers darker, apply another layer of charcoal and blend it into the previous layer.
You can continue this process of adding layers until the desired level of contrast is finally achieved.

What creatives can accomplish with charcoal is versatile and unique. While charcoal might not be a medium we often see being utilised, it is still a great medium to have tucked away in our portfolio.
Wanna switch things up? You can try mixing charcoal with watercolour too!
From whimsical fairy scenes, to stately portraits: charcoal can suit any style or mood. What has your experience with charcoal been like? Let's hear it in the comments!
Ellie Tran is a freelance illustrator and writer soon to be based in Anchorage, Alaska. She uses watercolours to illustrate her own stories; and when not illustrating or writing, she enjoys being out in nature.