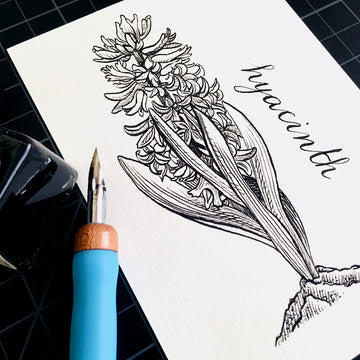
 If you’ve ever drawn or read manga or certain comic books before, you might have noticed that the linework is usually quite dynamic. This means the lines have weighted thicknesses to them to give a better sense of volume and depth to the subject.
With modern technology, many artists do this digitally using pressure-sensitive pens on a tablet. However, there is a niche of artists that still exist who still use traditional methods to get this kind of linework. Enter the dip pen, the predecessor to the fountain and the brush pen!
While some have argued that the dip pen is outdated and a hassle to use, there is something fascinating and nostalgic about learning this ancient craft. So if you’ve ever wanted to learn how to work a dip pen, this is a quick tutorial just for you!
Choosing the Right Nib, Ink, and Paper

First off, you’ll need the right tools to start. Pen nibs can either be bought individually or as a set (often found in the calligraphy section of an art store), but I recommend starting with the most versatile and beginner-friendly nib – the G-nib.
So-called because of how the breathing holes on the side look like back to back G’s, the G-nib fits in most standard nib holders, which can range from being fancy wooden holders or cheaper plastic ones.
For the holder, just pick whichever fits your budget and preference the most. And if this is your first nib holder, I recommend getting a straight nib holder as opposed to an oblique one, as they’re easier to pick up and learn how to use.
As for the ink, any bottle of Sumi (a.k.a. Chinese) ink will do. They’re cheap and have a good consistency to their ink flow for dip pens. Any ink that is labelled “manga”, “Indian”, or “drawing” ink should work too, but they can be more expensive as they tend to be waterproof while Sumi ink isn’t.
Finally, it’s also important to get the right paper. Paper that’s too thin may rip easily, and paper that’s too rough (like cold press or textured papers) will create a very scratchy and frustrating experience.
I recommend either Bristol or hot press watercolour paper, as they should provide a smooth surface without too much feathering (i.e. when the ink bleeds a little into the paper’s fibres).
Tip: Whenever you get a new pen nib, prep it before using it by cleaning it with toothpaste first or rubbing alcohol over the entire nib.
This is to get rid of the oil coating applied by manufacturers to prevent the nib from rusting. If you skip this step, you may find that the ink refuses to stay on your nib!
Bonus tip: Put your ink in a smaller glass container that’s about half the size of a film canister, and make sure its base is secure so you don’t accidentally knock over the container.
This just makes it easier to dip your pen to get the right amount of ink. Drawing inks may already come in a container that’s already suitable to use straight from the bottle, so you don’t need to transfer the ink in this case.
Understanding the Angle
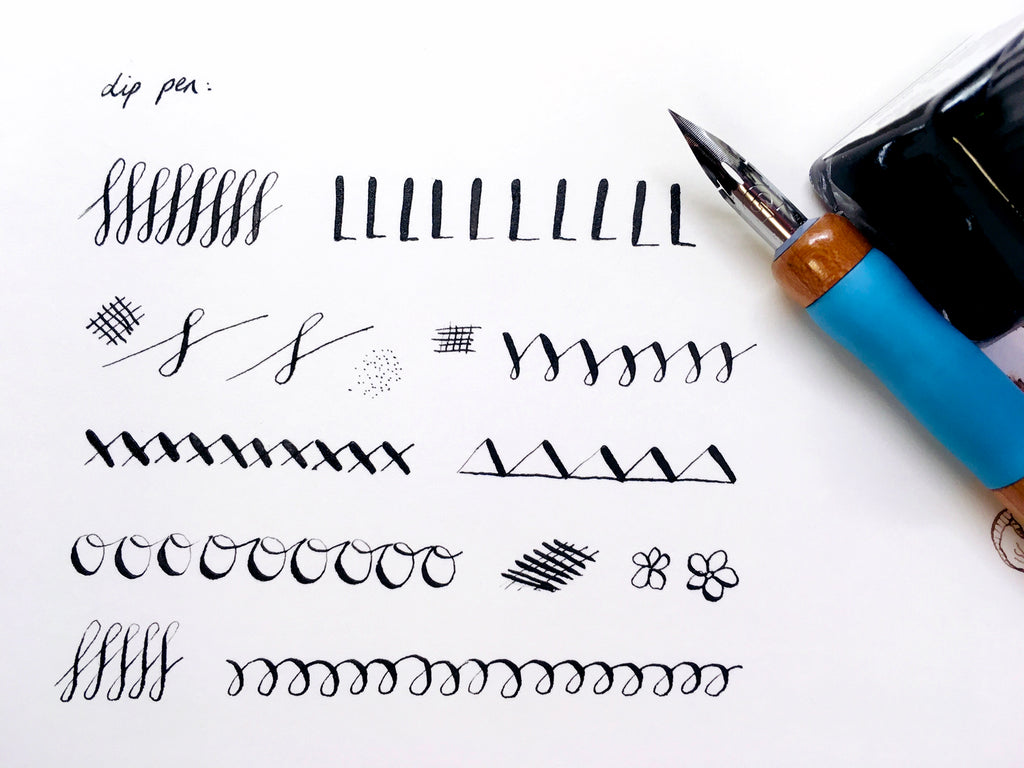
Once you have all your tools prepped and ready to go, you can start practising basic strokes with your dip pen. Just try to keep in mind 5 basic rules:
-
Dip the nib until the ink just covers the breather hole in the middle. Too much or too little ink can ruin the ink’s flow.
-
More pressure when doing a downstroke, less when doing an upstroke. It’s ok for the tines (i.e. the pointy end of the nib) to separate, but too much pressure could cause your line or your nib to break.
-
Try to keep your nib at a 45º angle to your paper at all times for the smoothest drawing experience. You may also notice that your nib audibly protests when being used at certain angles and drawing directions, so when this happens, just stop and readjust your nib (and paper if necessary).
-
Clean your nib every 10 minutes or so by swirling it in water and wiping the nib with a paper towel or rag. This prevents dried ink from clogging up your breather holes.
-
Remember that ink takes at least a few seconds to dry, so try to avoid touching your lines until the ink loses its wet “sheen”.
It’s going to be difficult at first, but start small. Draw some shapes with varying line widths, or you could even practice writing some calligraphy to get a hang of curved lines.
It’s fine to take it slow, especially when you’re trying to learn the way the ink flows and how to control it. In this way, it’s quite similar to watercolour painting, only your “brush” is much stiffer and can create much thinner and controlled lines.
When you think you’re ready, you can move on to more complex drawings, such as drawing a hand or some still-life objects.
Weighted Lines

Once you have a good grasp on how to control your line thickness, you can explore the style of dynamic linework. Studying your favourite manga or comic artists will help give you a better understanding of which lines should be thick or thin!
If it ever gets too overwhelming to learn all of this at once, feel free to switch to a fountain or a brush pen for a consistent ink flow, though these pens will have varying degrees of flexibility.
One of the benefits of the dip pen is being able to switch inks very easily, and that it just feels very classy to use!
You also learn how to control ink flow much better, and to make bold and confident strokes using your whole arm rather than just your wrist. But as it is with all skills, it takes time and practice to get good at it.
So if you find that dip pens suit your style, then, by all means, go for it! And you can always expand on this style by adding colour to your drawings. The important thing is to try something new and to discover your art one step at a time.
Want a deep dive into the world of inking? Check out our Introduction to Inking course!
Have you ever tried using a dip pen before to create a weighted linework drawing? Or do you find it too fussy for your liking? Feel free to let us know in the comments below!
Nicola Tsoi is a practising graphic designer and illustrator based in Hong Kong. During her downtime, she likes to watch birds do funny things, search for stories, and bake up a storm. She keeps a pet sourdough starter named Doughy.
1 comment
This helped me start! trying to figure out how far to dip my nib and this was great!