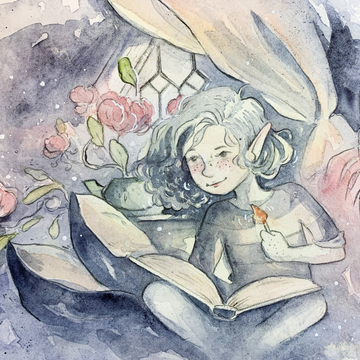
Lighting is a tricky element to capture in a painting. But lighting is very important to each and every painting: no matter if that painting is set at night, morning, noon, or twilight.
Although it is a tricky mood to capture, it isn’t impossible. The key to painting the likeness of light in our paintings simply takes a little bit of intentional effort.
The rule of thumb with painting is sometimes “to break the rules,” painting light requires a great deal of rule-following to get it right.
But it doesn’t mean creatives can’t experiment with the outcome! But these tips are the basic guidelines for watercolour painters capturing a dynamic lighting mood.
Whether it is an intensely lit scene or a soft glow: lighting your painting is possible.
Just keep in mind these methods are specifically for watercolour. Some of the following principles may apply to other mediums, but a few of them are; intended for watercolour paintings.
The Importance of Colour Theory

It’s important to have a decent grasp of colour theory when you’re thinking of painting a scene that has elements of light and shadow.
Colour theory isn’t just an arbitrary set of rules, it’s based on reality and how we see colour, light, and shadow.
Observing how our eyes perceive light, shadow, and how they work together will propel your lighting direction forward.
Maybe the two most important colour theory rules for painting light is contrast as well as warm and cool colours. These two components hinge on the ability to understand and paint light.
Even taking a glance outside our window proves this. Light and shadow create a sense of contrast. How intense that light may or may not impact the amount of contrast we see.
In turn, warm and cool colours enhance the contrast of light and shadow. Shadows are typically cool and dark colours, while light uses warm colours.
Lay Down the Washes of Light First

It sounds backwards to add light first, but it’s an important step to remember when painting light with watercolour.
Since watercolour is a series of translucent layers of paint, adding layers of light on dark paint won’t accomplish anything.
Adding light paint on top of dark paint when working with oils, gouache, or acrylic is possible, but the transparent nature of watercolour makes it impossible.
It’s very important to lay down a wash of light first before adding any element of shadow. The choice of colour is up to the individual artist, but it should reflect the mood and needs of the piece itself.
The perfect choice for moonlight or starlight can be anything from a soft, gentle, light blue to yellow or orange. Even white; can be used for the lighting.
To begin, take up a minimum amount of the lighting colour. Don’t be too eager to take up too much paint at once. Light is not overly saturated, and the first wash of colour shouldn’t be either.
Lay down a wash across the entire surface of the illustration, even the sections that will be shaded. You’ll later add the shadows on these layers, and the layers of shadow on the light will help the entire scene blend together seamlessly.
Let the layer of paint dry almost completely, but with enough moisture left to let the next layer granulate on the bottom layer.
This is when you can add a new, deeper colour to the light. If you’re painting a fire, a soft orange on a pale yellow would be ideal.
Don’t paint the darker colour near the epicentre of the light source. You only want to add some warmth to the light, and viewers will have a better sense of light if the darker colour gradually blends into the lighter layer.
Even with warm colours, the lighter the hue the brighter the source of light; darker warm colours (even if it’s only slightly darker) translates darker. Add layers however many times you need.
Adding the Shadows

Once you’ve added your base layers of light, it’s time to add the shadows. Again, going too dark too quickly can be a mistake.
Add light layers of the shadow a little bit at a time. Some areas of the painting might need contrast immediately, and that is perfectly fine.
You’ll see and know which parts of the painting need the shadows gradually shifting away from the light, and which shadows need the immediate contrast of the shadows.
Be sure to leave highlights and slivers of light. If you’re painting a subject with hair or fur that is cast mostly in shadow, it adds interest to the painting if you highlight the strands of hair.
You can paint these highlights by adding shadow on a perfectly dry layer and painting the section until just a sliver of light remains.
Adding highlights like this is one of many reasons why adding an entire layer of light is important.
What you need for your painting; the contrast, sharpness, or the softness of the lighting is entirely up to you. There really isn’t a right or wrong in what sort of lighting you choose.
But the more intense the lighting, the intenser will the contrast of light and colour be. The softer the light, the subtler the shadows should be.
If painting light and shadow feels touchy or makes you nervous, it’s perfectly fine to practice a few times on spare paper to make sure you get it just right.
Once you feel comfortable and familiar with the process, apply the same methods to your actual painting. Practice on a few shapes such as cubes, spheres, and cones!
Don’t feel bad if it takes a little bit of time to get the hang of painting light and shadows. It’s a learning curve for every painter.
It’s a balance of studying lighting references, knowing how light and shadow works and then manipulating the paint to accomplish the illusion on paper.
The more you practice, the more natural it will feel when you paint light and shadows.
1 comment
Thank you for this! Really appreciate the thoughtful explanations.