In my previous articles, I’ve described the process for drawing in both one-point and two-point perspective. Now it is time to tackle three-point perspective, the kind used when you are looking at something from far above or below.
The most common types of linear perspective to find in the real world are two-point and three-point, so be sure to concentrate on them especially well in your practice. Check out this blog post for a quick Introduction to Perspectives. This post will be a deeper dive into just three-point perspective.
Many students are intimidated by three-point perspective, and I was too when I first was made to do it in art college, but it’s not so bad and with a bit of practice you will make it second nature. 
Begin with the same setup as with two-point perspective. You have a horizon line, an established point where the viewer’s gaze is directed, and two vanishing points on either side of that centre point.
The third vanishing point will be either above or below the horizon by quite a lot of distance, so it will be shown later on in the tutorial. 
Now I am drawing a vertex (corner) for the box we’re drawing, just to give us a centre for drawing the rest of the lines.
While one-point perspective has an entire face of the cube facing the viewer head-on, making the vertical and horizontal lines of that face parallel with the paper’s edges, two-point perspective has an edge facing us, so it is only the vertical lines that will be drawn literally vertical.
Three-point perspective has no horizontal or vertical lines drawn parallel with the edges of the paper since it’s just a corner facing us.


Connect the vertex to the two vanishing points on the horizon line just as you would with two-point perspective. 
Now’s the part where the third vanishing point comes in. For the sake of this demonstration I’ve drawn it below the horizon, but above works just as well if you’re drawing an object in the sky.
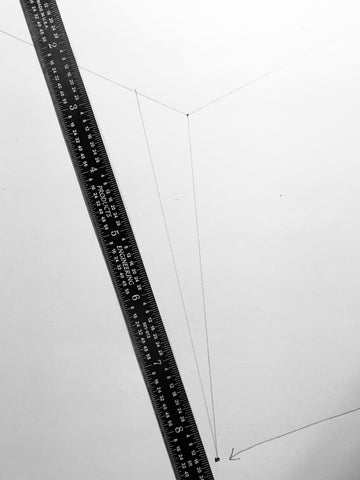
Now, as I stated earlier, instead of drawing vertical lines with a T-square like you might with two-point perspective, draw them with a regular ruler and make them all meet at this third vanishing point so that the final drawing makes the corner of the cube look like the closest thing to us instead of a face or an edge. 
Begin drawing the sides of your box by drawing those lines from the new corners of the box to the vanishing points. The box is starting to look very boxy now.

When you’ve finished with this, you will have a nice box! Notice how it looks as though we’re standing above it and looking down at it since that top corner is the closest thing to us and all other lines recede to vanishing points instead of going straight up and down or side to side. 
To enhance the visual effect, shade the box. Now it looks truly three-dimensional! At this point, you can be proud of your hard work and enjoy the illusion of depth on the page.
There are some things to keep in mind which will make it easier to get three-point perspective looking right.
The first thing that helps if you’re having trouble wrapping your head around the concept is to find a box-shaped object in your home, and draw it from observation without worrying about vanishing points or using a straightedge.
Just draw it freehand from several different angles and then discern after the fact which type of perspective each view gave you.
You can try to choose a perspective type before you draw, then draw freehand and see how close you get to the accurate perspective.
Notice how having a face of the box turned towards you will produce a one-point perspective, having an edge facing you will produce a two-point perspective, and having a corner face you makes three-point perspective.
Another very important thing to remember, and I’ve probably said it before, is to make sure you keep your pencil sharp.
A dull pencil will be imprecise, and you need precision for this exercise. With your pencil sharpened, make sure not to shift it in your hand too much while drawing a line against a ruler, because if your grip changes the line will be crooked.
Lastly, place the ruler a millimetre or two away from where you want the actual line to be so that there’s room for the line to be there.
Three-point perspective is definitely intimidating when you are just starting out, but hopefully, the advice in this tutorial will make it not feel so bad!
Want to try out your new perspective skills? Check out this fun free art tutorial!