The last time we painted together, we tackled the subject of deciduous trees. Now I’ll show you a method to draw and paint pine trees.
I am tackling these trees separately; is because they are different types of structures, and while the basic principles of drawing remain the same for both, they are worth practicing separately.
To begin with, here is a Plein air graphite drawing of a pine tree. Right away, you’ll notice that the main thing to understand here is the same as the key to drawing deciduous trees well: Keep a balanced level of detail.
That means that you don’t draw the whole tree as a simple triangle shape, ignoring the individual branches and gaps where the light shines through, but also you don’t draw individual needles unless you are very, very close.
Our brain sees all the details but doesn’t perceive it all at once. So, if you draw something too detailed- it will just look messy. This is also good to remember when drawing portraits.

I recommend drawing all types of trees in graphite while outside so that you can focus on their forms without being distracted by colour mixing and managing paint dry time.
Even when you're experienced, it is still a good exercise. Now, the painting tutorial portion of this blog post will demonstrate how to paint a backlit Pine tree so that you can focus on the basic silhouette of the subject.

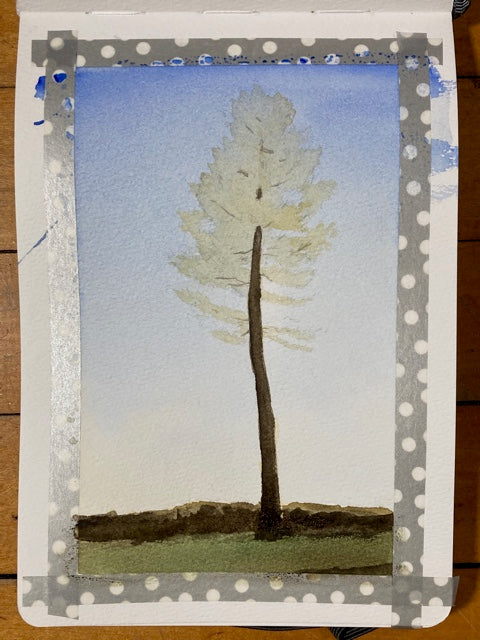
Once you have drawn a very light outline of the tree and the ground, use some masking fluid as shown to keep the ground defined.
You will then use a wet on wet method to add the blue sky, leaving the bottom white and then adding in a tiny hint of yellow ochre at the bottom to suggest evening golden light.

Remove the masking fluid and add a light wash of yellow ochre to everything. In my picture, it looks like the masking fluid is still there, but that is because sadly the masking fluid I bought alters the surface of the paper to be tinted a little bit yellow and then absorb the colours more darkly.
Check out our blog on everything you need to know about Masking Fluid if you want to learn more about it.
I’m sharing this anyway because it proves the importance of quality supplies when you use watercolour. Even an experienced painter will struggle with poor quality supplies.

Add some deep, cool browns and greens as well as some more yellow ochre to flesh out the tree trunk and the ground. There’s a bit of vegetation in a field just behind the tree so I’m starting to define that now.

Add another layer of brown, and if necessary, blend it with your finger a little to make the transition from the ground to the field look a little more natural. Some shadows will be more starker than you expect.

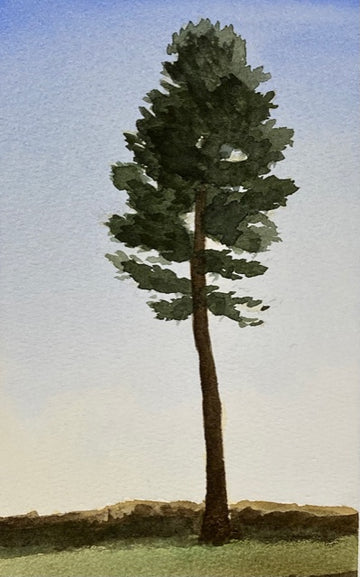
Now, it is time to add the final colours to the pine tree itself. Use a cool and very subdued green mixture. Always have the point of the brush facing towards the edges of the tree and use that point to create the suggestion of individual branches.
Individual needles won’t show here because we are too far away from the tree. Don’t go over a place you already painted too many times, because that will make the edges too dark and the middle too light, and that’s very hard to fix if not impossible.

Now, let the previous layer dry completely because, to define more branches and add dimension, you need to be able to sharply define more branches over the top of the previous ones.
Use the same technique as the previous layer, using the point of the brush to suggest the shapes of the branches.
Blending some wet paint into other wet paint is fine here because shadows fall more softly in some places than in others. Still, you want most of the lines to feel jagged and suggest branches.
Remember that pine tree branches generally turn upward instead of downward (there are always exceptions, but that’s what they are, exceptions).
A huge part of making a tree look real is to take careful note of that tree species’ growth pattern and what directions the branches take. If the branches fork, where do they fork and how often?
These are things we don’t think about when we’re just casually looking at trees, but they’re very important for painting a tree.
Trees are more difficult to draw and paint than many of us expect, but they’re so important because they make up a huge part of the landscape around us.
Also, when you master drawing trees, you can be creative in how the trees embody the mood of a setting.


