Watercolour has become a popular medium, yet it still intimidates many beginner artists. Here we will guide you through the basics of watercolour, the supplies you will need to get started, and a couple of easy techniques.
Supplies
To get started with watercolour painting, there are a few basic supplies you will need:
Watercolour Paint
Watercolour paint comes in either dry pans or wet tubes. Which option you choose will depend on your creative process and personal preference (which may take some time to figure out).
You can also find different grades of watercolour paint: student grade and professional grade. When starting with any medium, it’s best to start with student grade supplies because they are more affordable.
You don’t need expensive art supplies when you are just learning! But once you become familiar with your medium, you can upgrade to professional-grade, which means they are higher quality and (often) lightfast.
Brushes
You will need some paintbrushes to go with your watercolour paints! But not all brushes are made the same. You want to look for brushes that are labelled as watercolour brushes specifically.
Traditionally, the best watercolour brushes are made with animal hair like sable or squirrel. Natural hair has ridges that help to hold water inside the bristles.
However, if you are looking for a budget-friendly and cruelty-free brush set, many synthetic brushes are available on the market.
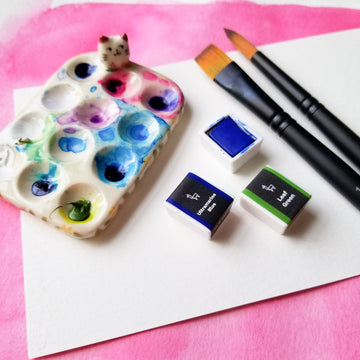
Palette
A palette may be an optional supply depending on whether you use dry pans or wet tubes. Many artists using dry pans take the paint directly from the pan and apply it straight to the paper, and dry pans often come with their container that doubles as a palette.
However, if you use wet tubes, you may want to consider a palette. The best type of palette for watercolour is a porcelain or ceramic palette.
This is because the water won’t bead and separate on the ceramic surface, which means it will be easier to mix your paint, and you can more clearly see the hue and opacity of the paint you are using before you apply it to paper. Ceramic palettes are also easier to clean and don’t stain.
Paper
It’s imperative to select the correct type of paper for your paints! Watercolour works best on cold press paper or hot press paper. Both types have their properties, but they are specifically designed for wet mediums like watercolour.

Tape, Water, Paper Towel
In addition to the four main supplies outlined above, you will also want to use masking tape (or a sticky washi tape) to tape your paper to your work surface, a jar with clean water for mixing paint and cleaning your brushes, and a paper towel (or a cotton cloth) for drying off your brushes and cleaning up any spills.
Swatching
Before using your paints, it’s a good idea to swatch each of your paint colours. First of all, it’s good to see what your paints will look like once they are diluted with water and dried on your paper. Secondly, it’s an excellent opportunity for you to practice mixing the best water-to-paint ratio for your set of paints.
One of the number one challenges experienced by beginner watercolour artists is adding too much or too little water. Too much water will make your paint too faint, and too little water will make your paint look garish and clumpy.
Each brand and colour of paint may require its unique water-to-paint ratio, so it’s best to swatch each colour to know what to expect before you dive into a painting.

Mixing Colours
You don’t need to buy dozens and dozens of different colours of paint. With a basic understanding of colour theory, you can mix many different colours by simply using the basic primary colours: blue, red, and yellow. Adding black to your set will also be helpful!

Basic Techniques
There are a few basic techniques that every beginner watercolour artist should learn. Here are a couple of techniques we recommend below:
Wet-on-Wet
Using a mop brush or flat wash brush, apply either wet paint or clean water to your watercolour paper and then immediately add wet paint on top before the paper has time to dry. This technique is best for loose shapes and soft feathery edges.

Wet-on-Dry
Unlike the wet-on-wet technique, wet-on-dry provides you with a lot more control over your paint. Leave your paper blank (or wait for the previous layer of paint to dry completely) and add wet paint.
Because your surface is not wet, you can control the movement of the paint with your paintbrush. The paint will also have a hard edge when dry rather than a feathery edge like the wet-on-wet technique.

Practice, Practice, Practice
Even the greatest watercolour artists didn’t master the art of painting overnight. It can take months or years to become comfortable with watercolour painting, and everyone learns at their own pace.
Please share your art journey with us! Follow us on Instagram and tag us in your art posts.
Subscribe to our email newsletter for more art tips and news on our products!