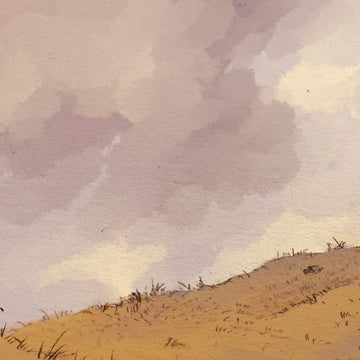
When I was first learning illustration, I told people I would stop making digital art as soon as it wasn’t a class requirement. I said I was stopping digital because I liked the way traditional media only allows one original copy of each painting, but it was really because I found computers intimidating.
Fortunately, the classes that my school pushed involved so much digital art that I had no choice but to face my fear of the computer. Over time I got comfortable with digital painting, and now I love doing it!
After experimenting with digital over time, I realised that my style would be more distinct if I incorporated elements of traditional art into my digital work.
As you read this post, think about what elements of your traditional art are the most fun for you to create and that looks the most distinct compared to other artists. Because even though I use graphite as the traditional part of my digital paintings, you might have another idea entirely.
Now, let’s begin! For this example, I used Adobe Photoshop and a Wacom Intuos tablet, but you can use the program and tablet of your choice and adapt the technical instructions for your setup.
As far as brushes are concerned, I only use the plain round default brush in Photoshop and sometimes one of the painterly smudging brushes for blending, but it’s been so long since I changed my brush settings that I don’t even remember which smudging brush I use.
I can’t even remember whether it’s a default smudging brush or one that I did work for that purpose. Just find one that you like.

To start with, I made a minimal yet cleanly textured sketch of a well-known hill in my city. A landscape is an excellent first project for this because it's going to be pretty forgiving. I suggested some shadows but kept the shading to a minimum because I didn't want to grey out the colours I would add later.

This is the finished piece, and we'll be dissecting this together so you can see how I transformed the sketch into the painting! Before you do anything, you're going to want to duplicate the layer that has the sketch photo, then set the duplicate to "multiply" and make sure it's always on top of any other layers you add.

Without frustration, the key to digital painting is to use layers for each part of your painting that you wouldn't want to accidentally paint over or erase while working on another part. Especially on a tablet without a screen like the Intuos, it's a lot easier to clumsily bump into part of your painting that you didn't mean to while trying to work on another part.
Separate everything by colour and by your intention to either blend or not blend the hues, and you'll have a much easier time painting than if you didn't.

Here you can see I toggled off some of the layers so you can see what I did first. I put a layer of light cream over the whole thing to remove the paper's white and have an overall "mood colour" to choose the other ones relative to it. Then, I made another layer on top of that and added the base colour of the hill.

I painted in some clouds to add interest and depth to the sky, but I didn't do it all in one layer. I scribbled in some purple, blended it out with the aforementioned forgotten smudging brush, and then made a new layer so that any blending I did next wouldn't ruin my earlier work.

Here's my second layer of the cloud! As you can see, I went with an even deeper purple and increased the contrast so that the sky would be more dynamic.

Now, we come to more detail on the hill. I'm showing you this screenshot of these two layers because all shading in my method works. You create a new layer and clip it to the layer underneath it so that everything you do on the new layer stays within the bounds of the first layer.
There are different ways to create the new layer and clip it depending on what program you use and what buttons you like to click on.

The colour you use for the shadows on the new clipped layer will depend on the subject matter. I thought a soft purple like I used for the sky would nicely tie this picture. I used the same "scribble and blend" technique for this section.
Also, it's worth mentioning that the layer I drew the rocks on is underneath the layer I used for the hill. If you put the large swath of colour on top of the little details, you can leave spaces for them in that big layer, and when it's time to add the details, you can just aimlessly scribble that colour underneath until all the tiny spaces are filled.
I like to get the work requiring precise edge control over at the beginning of the picture instead of having all these little corners and edges to deal with at the end.
I hope you enjoy this method of working! It has become one of my most frequently used techniques.
Here are some before and after pictures of other pieces I made this way; see if you can work out what layers happened in what order!


Happy painting! If you got value from this article, you could read more as soon as we release them by subscribing to our email newsletter. Tag us on social media if you try any of these techniques!


2 comments
Hi, This post is great. Can you tell me how you did it, and how I can do the same?
Nice job Elsa…thank you for sharing, I will try this out!