
This is part two of a series covering the basics of drawing human facial features for your stylized illustrations. The first post in the series covered basic construction of the head. If you missed it, you can find it here.
PART II. EYES
Do you believe that eyes are the window to the soul? Even if you don’t, the eyes of your characters convey a lot of expression, emotion and play a big roll in telling the story of your painting or illustration.Placement
In the average adult, the eyes are positioned near the middle of the face. In children, the eyes sit lower.

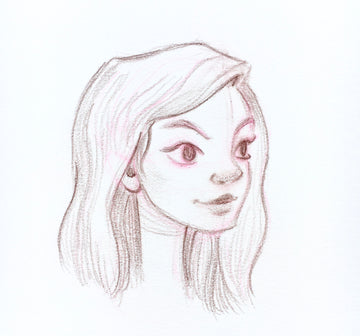
Eye Shape, Size and Spacing
[drawing-eyes-2.jpg]

A realistic human eye is shaped like this. The important thing to notice here is the way the line breaks on the top eyelid and also on the bottom.
Changing the shape and size of the eyes can bring character and uniqueness to the face. Generally, in children, the eyes will appear larger and they will also be spaced farther apart.
Try different shapes, sizes, placement of the eyes to change the look and personality of your character.
Eye direction

One of the most important considerations when it comes to eyes is which direction they are looking.
A common mistake is to maintain the circular shape of the pupil as the eye looks off in the periphery. Often this looks ok, but it gives the feeling that the character is staring off into space.
Remember that the eyeball is actually a ball or sphere and as the pupil moves to the edges of the sphere it becomes compressed into an ellipse.
In the example on the left, you can easily tell where the character is looking, but it’s less clear for the character on the right.
Also, keep in mind that the pupil will protrude a bit from the eyeball.
Eyelids and Eyelashes

The eyeball sits inside an eye socket and is surrounded by upper and lower eyelids and eyelashes that obscure much of the ball shape.
You can help to suggest this illusion of the eye being set inside of the socket by using a thicker line for the upper lid.
The top eyelashes are naturally heavier and form a dark shadow under the eyelid.

Notice in the example above, the eyelashes on the eye that is farther away appear to wrap around the eyeball.
This will keep the face from feeling flat. You can also give female characters longer, thicker eyelashes.
Eyes in Perspective
As the head turns in space, keep in mind that the eyes will change slightly in perspective and the eye that is farther away will become hidden behind the bridge of the nose. Also, pay attention to how the eyebrow looks on the opposite side.
The eye that is farther away will not change in height as the perspective shifts, but the width will change—it will get narrower as the head rotates.
Eyebrows and Expressions
Experimenting with different types of eyebrows is another way to give personality to your characters.

The flesh around the eyes including the eyebrows, eyelids and under-eye area all tend to act in unison. You can get a feel for how this works by looking in the mirror and raising and scrunching your eyebrows.
To better understand how this translates into your drawings, it is helpful to imagine a mask that is painted across the face.
You can see how the eyebrows might compress the eyes or pull them open depending on the expression.

Painting the Eyes
Often I don’t render the eyes in my characters with very much because I like them to look more simplified, but sometimes there are situations where you will want to add a bit more realism.
When painting an eye, avoid choosing white for the sclera. Even though we think of the whites of the eye being white, they’re often much darker than you would think.
For the iris choose a darker, less saturated version of the eye colour you want. Then determine where the light is hitting the eyeball.
The part of the iris opposite from the highlight is where the eyeball will be bright and luminous and the colour will appear more saturated.

In the illustration, much of the style of a character is determined by the eyes. There are many different approaches, so I recommend trying out lots of different types to see what you like best.
As with anything, the more eyes you draw, the more comfortable you will get with their anatomy.
I hope you will join us for part three where we will draw noses and lips.