
In this is part three of a series covering the basics of illustrating human facial features. If you need to get caught up, go back and read my previous posts on drawing the head, and drawing the eyes and eyebrows.
DRAWING NOSES
Start paying attention to noses in your favourite illustrations and you’ll notice they come in a huge variety of shapes and sizes and they range from very simplified to somewhat realistic, depending on the art style.

When drawing a nose, I like to start with a ball and then I add a triangle on top. Drawing an upside-down kite shape over the top of the nose can help you visualize how it looks from different perspectives.
Nostrils in Perspective
For me, one of the hardest things to grasp about drawing noses is how nostrils look from different angles because you’re not just thinking about how the nostrils look as the head turns.
You have to also, remember that the ball of the nose will actually start to overlap and obscure the nostrils as the perspective changes.
The best way to understand it is to look in the mirror and watch your nostrils as your head slowly turns. Especially watch what happens to the nostril that is farther away.
Stylization
Here are some examples of how noses can be stylized. Changing the nose can have a huge effect on how a character looks. Try playing with the length of the bridge, size and shape of both the ball of the nose and the nostrils. You can use almost any shape you want!
Children and young women are usually drawn with smaller, more upturned noses that are indicated with the fewest lines possible.
A rule to keep in mind for faces is that the more lines you add to a face, the less cute it gets. If you want your characters to look cute, keep the features very simple.
For example, you might even omit the lines indicating the bridge of the nose.
Keep in mind that noses usually start small in babies and children, but like the ears, noses continue to grow indefinitely.
Squash and Stretch
Remember that the bridge of the nose is fixed and doesn’t move, but the ball of the nose is soft and flexible and can change shape with different expressions.
DRAWING LIPS
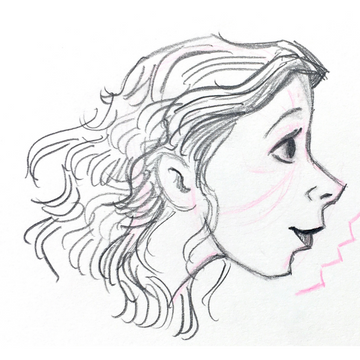
When drawing lips, it’s helpful to visualize the planes of the face. It’s easier to see this when you look at a face in profile. Notice the stair-step pattern?

The face has an alternating pattern of upward and downward facing planes which can help us decide which parts of the face should catch the light and which parts will be in shadow.
The top lip is a downward-facing plane and the bottom lip is an upward facing plane. When lit from above, the top lip will be in shadow, and the bottom lip will be lit.

Most of the time the top lip appears thinner than the bottom lip. That’s because we usually see more of the bottom lip than the top one.
Mirror, Mirror
Lips are stretchy and flexible. The best way to practice drawing different lip shapes is to do studies of your own lips using a mirror.

Stylization: Omit Details
Outlining a character’s lips completely tends to make them look like they are wearing lipstick. This is typically not a look you’re going for when drawing men or children.
Keeping the lips simple and emphasizing the bottom lip rather than the top one gives characters a less feminine and more natural look.
Also, if your mouth is open and teeth are visible, be careful about drawing too much detail or outlining the teeth because it tends to look unappealing.
PUTTING IT ALL TOGETHER
Feature Placement

On the average person, the nose is in the center of the face (as opposed to the center of the head, which is where we said the eyes go in the previous post. You can measure this by finding the center point between the eyebrows and the point of the chin.
Usually, the nose and ears are about the same height and the bottom of the nose lines up with the bottom of the ears.
The lips are typically about halfway between the nose and the chin.
Fun with Faces

In the example above I tried to keep the character relatively the same, just changing the size of the nose and the placement of features. You can see that it’s easy to come up with lots of different faces! Have fun and see what you can create!
You made it! This is the end of this three-part series. I hope you’ve found it helpful. Now you can take what you’ve learned to go create some interesting faces with solid anatomy. If you do, please tag me @kristinwauson on social media, as well as @etchr_lab so we can see what you’ve made!
—————
1 comment
Thanks for putting this series of tutorials together. There were loads of tips and details that I wasn’t aware of, even though I thought my knowledge of anatomy was pretty good. Very helpful!
———
Etchr Lab replied:
We’re glad it was helpful, Amanda! 🧡
———
Etchr Lab replied:
Hey Amanda! We’re glad that this tutorial helped expand your knowledge of
anatomy. We hope you enjoy making more art!